
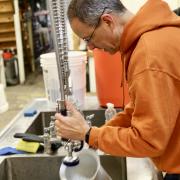
Thought I would share some information about the build-out of my new conical. For those that want the fullest of information, I highly recommend this thread on HBT (http://www.homebrewtalk.com/f51/super-simple-15g-plastic-conical-276378/) or this one which has a nice sum-up (http://www.homebrewtalk.com/f51/super-simple-15g-plastic-conical-revisited-326384/). There's a TON of information in both of these threads, I'm going to try and distill this down to something usable here. First, couple of pictures:
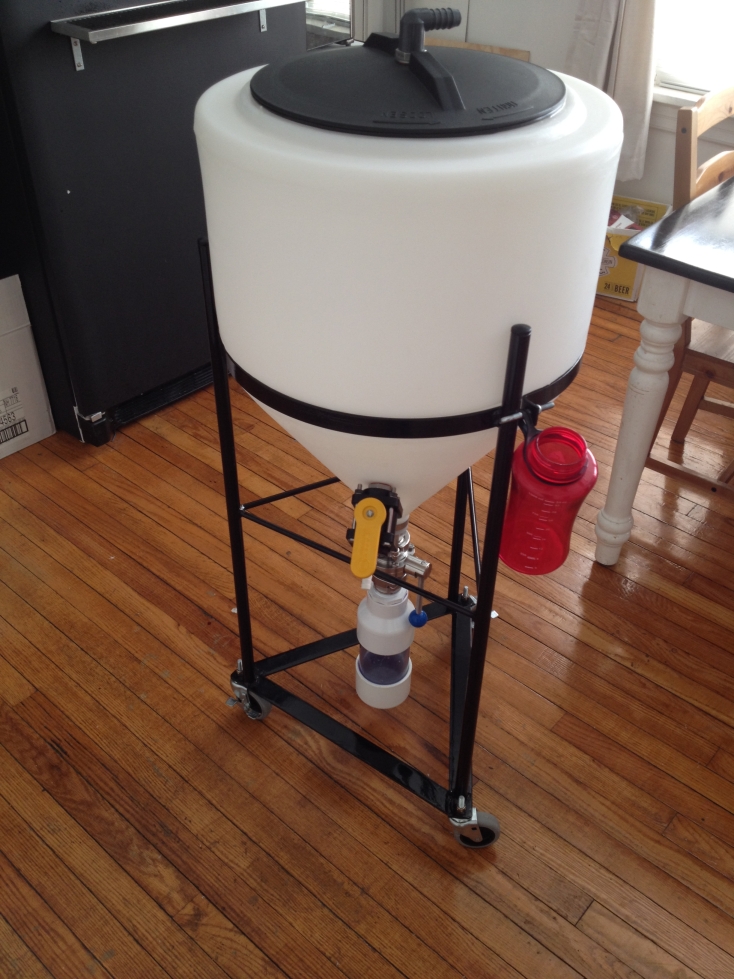
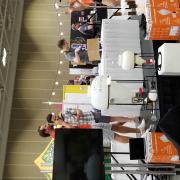
Inductor Tank and Stand
So the base for this entire setup is a plastic inductor tank that you can find at several websites. There are two versions of tank that you can get, regular and full drain (also called open flow). The full drain tank is slightly different at the bottom so that there is no lip and all of the liquid inside can drain out. There is little to no difference in cost with the regular vs full drain, so I went with the full (who wants to waste good beer!). The tank itself is about $60 and came in enough packing peanuts to last a lifetime. You can get the tanks at:
- spraysmarter.com
- ruralking.com
- www.tank-depot.com
- http://lmgtfy.com/?q=Inductor+Tank
In addition to the tank itself there are also stands that you can get for about the same cost as the tank itself (~$60). I went ahead and got the stand because I'm lazy, but it seems like the majority of people on HBT just built their own out of wood. Here's some links to people's stand builds:
- http://www.homebrewtalk.com/f51/plastic-mart-135-15-gallon-conical-tank-...
- http://www.homebrewtalk.com/f51/15-gallon-fermenter-table-build-223291/
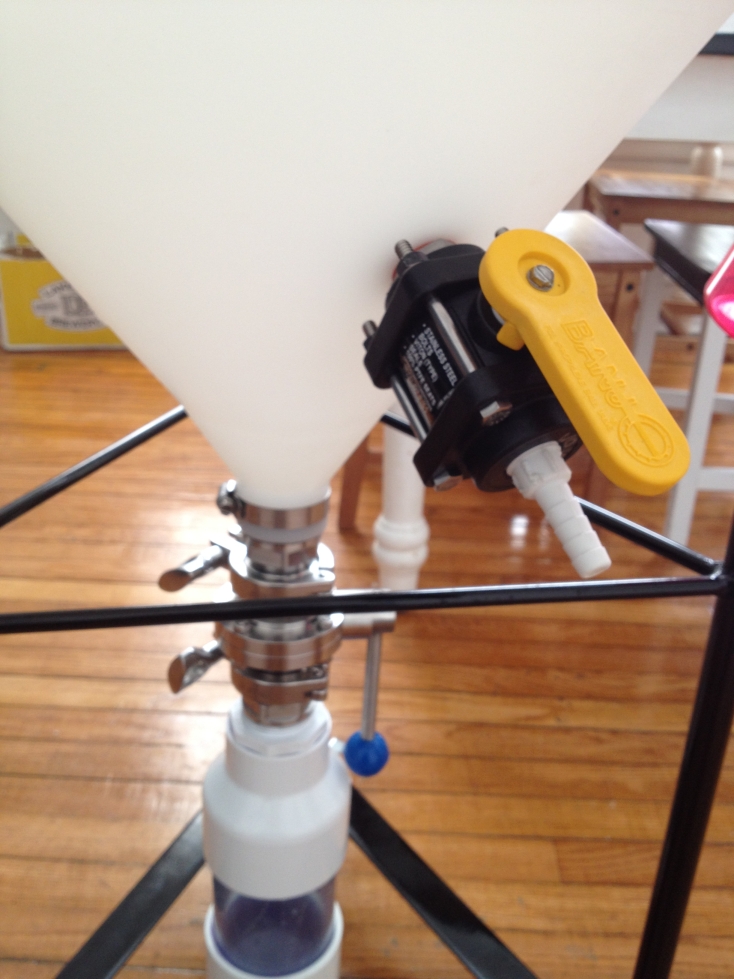
Tank Bottom Fittings
So the very bottom of the tank has at 1.5 FPT fitting. Please note that this may be different depending on if you get an full drain vs. regular, as well as the size of the tank. The fine folks over at HBT have had many discussions and variations on the types of fittings that were used on the bottom. In the postings I saw everything from a PVC ball valve, traditional brass or stainless ball valves, and butterfly valves. The consensus was that as long as you cleaned it sufficiently it would be fine. Some people preferred butterfly valves because they have fewer places for nasties to get stuck but many also had great success with simple cheap PVC ball valves.
I went with the tri-clover fittings because I could and I was hoping to have an easy way to gather yeast. Don't forget to double check the size of your tanks fitting on the bottom. I got the following from Brewers Hardware which has always treated me well. I also went with the BUNA-N gaskets as their description, as well as some discussion on HBT, said they were good and at $.50 each they're easy to replace if anything goes wrong.
- 2 x http://www.brewershardware.com/1-1.5-Tri-Clover-X-1.5-Male-NPT.html
- 1 x http://www.brewershardware.com/TC15VBFVPT.html (Butterfly Valve)
- 2 x http://www.brewershardware.com/1.5-Tri-Clover-Clamp.html
- 2 x http://www.brewershardware.com/1.5-Tri-Clover-Gasket-Buna-N.html
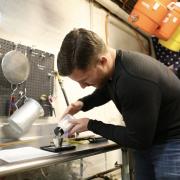
Yeast/Trub Catcher
So one of the other things that occured in the HBT discussion was putting a yeast and trub catcher on the bottom of the conical. The idea here is to put the catcher on and then sanitize the entire thing together, leaving the butterfly valve open, and then racking the beer into the fermenter. If you have sized it properly then all of your trub will settle into the catcher, you can just close the valve, and dump the trub. From here, you can either re-sanitize the catcher and re-attach it to the bottom or, if you're worried about the oxygen and other stuff getting into your beer just leave the valve closed for the rest of fermentation. If you do put the catcher back on this can be a very easy and quick way to harvest yeast for the next time around.
There are many different builds that people had for this, some using sight glasses, others using good old PVC or CPVC, and some even using very wide flexible tubing. What is most important here is that you get something that is inert, food safe, and that doesn't react to the beer. Having just spent a ton of money on those tri-clover fittings, I decided to keep it cheap and go the PVC route. I did; however, want to be able to see into the fitting so I bought some clear PVC online. Schedule 40 PVC is rated as food safe and it used in both the beverage and food industries, so I feel pretty safe using it. Opinions were mixed (as always) on HBT but many people were using PVC with no issues. First, here's a few options that are different that what I did:
- http://morebeer.com/products/ultimate-yeast-harvester.html
- http://www.brewershardware.com/1.5-Tri-Clover-Sight-Glass.html
You may also need to use an elbow depending on the height of your stand, for mine things worked out find just going straight in. I went with about a 1 qt catcher as many others on HBT said that size worked well for them with the 10-13 gallon batches they were making. Given that I was using 3 inch PVC that meant I needed about 6 inches of height. Here's a closeup:
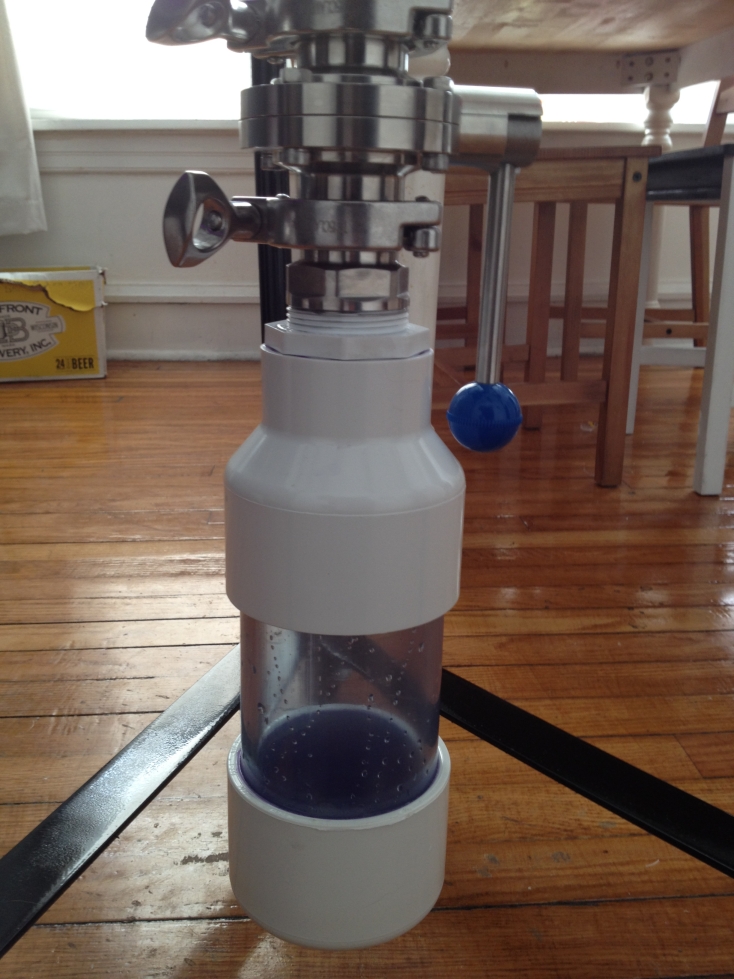
The parts were all from McMaster (aside from the PVC itself) and can also be found at your local hardware store. McMaster part numbers are in parenthesis:
- 2 in. pipe to 1.5 inch FPT bushing (4880K216)
- 3 in. to 2 in. PVC reducing coupling (4880K686)
- Clear 3 inch PVC (Many guys on HBT just used the normal white opaque stuff too!)
- McMaster part # 49035K49
- http://flexpvc.com/cart/agora.cgi?product=PVC-CLEAR-PIPE-NSF-Sch40
- 3 in. PVC female cap (4880K57)
As a side note, it surprised me that clear PVC wasn't all that bad, but clear PVC fittings are incredibly expensive! The PVC cement I had from Home Depot said that it was food safe, so I went ahead and used that, many others on HBT did as well.
Weldless Fittings
I went ahead and put together my own weldless fittings because I had a large McMaster order anyway. Here are the parts I used. I ended up using two sets of weldless fittings, one in the lid for the blow off and another on the side for sampling and transfering of beer. Both were 1/2 inch because I had a ball valve that already fit. Also, I first went with 1 1/8 in. fully threaded stainless steel pipe nipples but they were too short and I had to get two longer ones. Also, remember that you can't have copper come in contact with fermenting beer. Its ok for boiling, but longer term its bad. As above, McMaster part numbers in parenthesis. For each fitting I got:
- 1 x 1/2 in by 1 1/2 in long threaded stainless steel pipe nipple (4830K172)
- 1 x Package of silicone o-rings (9396K32)
- 1 x Stainless steel shims / washers (98126A797). Note: I ended up not needing or using these
- 2 x 1/2 in stainless steel locknut (4452K674)
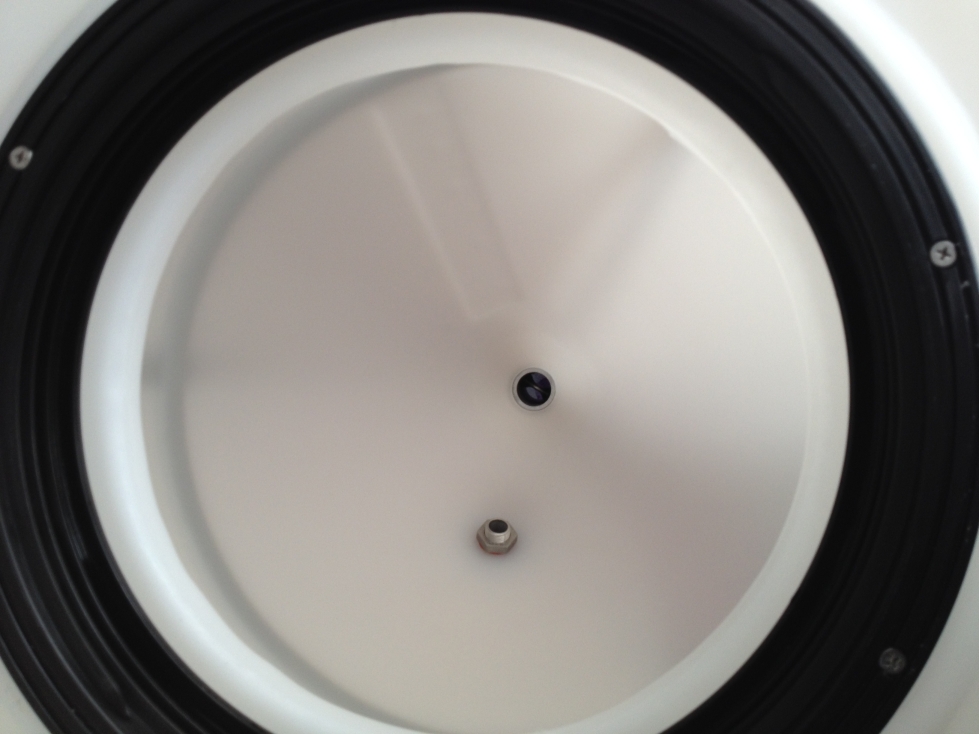
Sealing the Lid
There was a great deal of debate on HBT if you needed or should seal the lid. Overall the pressure of the CO2 from fermentation should keep nasties out but the lid on this thing leaks a lot. So much so that many people noted that their blow-off tube wouldn't bubble. Overall many people seemed to do things just fine without the lid and I plan on doing so for at least a while. There were two primary methods of sealing it up from what I saw. In both cases you need to take the black plastic that is screwed in (with stainless steel screws from all appearances) that has threads for the lid off and seal it. I used a food-safe silicone sealant (http://www.amazon.com/00688-Household-Waterproof-Adhesive-2-8-Ounce/dp/B000KE4PBQ/) and its worked really well. You can also use some weatherstripping like this guy did (http://www.homebrewtalk.com/f51/super-simple-15g-plastic-conical-276378/index35.html).
The silicone left a bad smell for I left the fermenter outside for a couple days in the sun and it cleaned right out. Once you have the threads sealed you can either get an o-ring (http://www.orings-online.com/) that is fit to the size or use some "D" type weatherstripping from somewhere like home depot. Here's a few pictures at the bottom of this summary post (http://www.homebrewtalk.com/f51/super-simple-15g-plastic-conical-276378/...).
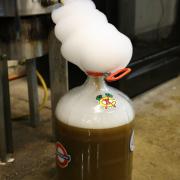
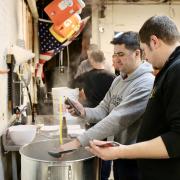
Blowoff Tube
Once the lid was sealed, I just used a single PVC hose barb that was 1/2 inch that attached to my weldless fitting in the lid. I ended up dremeling out some places in the lid so that the fitting would go in the middle of the lid. The PVC fitting I got was McMaster part 48315K51.
I'm going to use 1/2 inch ID hose into a knock-off nalgene bottle I had sitting around that I'm hanging on the stand. Longer term I'm going to design something similar to this (http://www.thingiverse.com/thing:42617) caddy and then 3D print it out. For now, I'm just using some extra plastic from the original lid.
Beer and Sample Valve
Finally, I drilled a hole about 6 inches up the side of the cone to fit my output for samples and beer. For the time being I'm not putting a racking arm on the inside but hope to eventually. There are many designs here you can use all across HBT so I'm not going to summarize them here. Plastic, PVC, flexible stainless, and tons of other options exist. I already had a 1/2 inch banjo ball valve, so I went ahead and used that. If you want, you can also get these from places like SpraySmarter (http://www.spraysmarter.com/4-bolt-poly-ball-valves-1-2-inch.html), but any valve will do. Finally, I got a 1/2 in. barb from McMaster as well (48315K91).
Casters
Finally, I put a set of three casters on the stand. The stand I bought had 3/8 inch holes on them and I got some locknuts from McMaster and casters from Amazon. Two of the wheels lock so there's no rolling beer in the ferm room!
So overall this has been fun, I completed the build last week and let it sit in both water for a while to make sure there were no leaks. You guys will see this in the ferm room starting this weekend as I'm going to be brewing 10+ gallons of something to be decided. Please don't open it, but if you have any questions don't hestiate to let me know. Depending on how this goes, longer term we should totally consider building a 60/70 gallon version of the same thing (with fewer fittings I think) for our barrel projects. You can get the tanks all the way up to over 100 gallons and I've seen a few breweries that are using them full time. Here's a few other general links for those of you want want more to read:
- http://www.homebrewtalk.com/f51/super-simple-15g-plastic-conical-276378/
- http://www.homebrewtalk.com/f51/super-simple-15g-plastic-conical-revisited-326384/
- http://nilrodbrewery.blogspot.com/2010/12/diy-inductor-tank-conical-fermenter.html
- http://www.homebrewtalk.com/f11/inductor-tank-regimen-329664/
- https://www.homebrewersassociation.org/forum/index.php?topic=8024.0
- http://www.homebrewtalk.com/f51/dts-conical-build-221110/


What are you going to do with a 15 gallon batch size?!
I figured I'll do 10 - 12 gallons each batch so I'll have two kegs!
Oh... my... god. Why haven't we done this? http://thechive.com/2013/09/17/guys-rig-up-buddies-plumbing-with-beer-wh...
Awesome
This is great Lucas!
Dude, that's pretty bad ass.
Thats sweet
The emperor is not as forgiving as i am
Do you whirlpool with your setup? I thought you guys were using a rims setup with pump. If you are you can whirlpool and then stand, followed by pumping into the conical. Then you don't gave to spend all the additional dough on that catch thing. TC to other threaded can be expensive.
Throw a racking arm on your side port and harvest yeast will be nice and clean and easy.
Looks like another awesome project Lucas. Good job.
Oh. Get yourself a PVC spray ball and a weldless firing for the lid. Then you can clean in place by circulating. No need to worry about scratching that with a sponge.
Do you know of a place where you can get the clean in place type fittings in PVC? I've only seen them in stainless and they were exspensive so I've been holding off a lil bit. I was planning on using the same weldess fitting that I currently have for blowoff and just attaching and pumping from that. Thoughts?
Oh... my... god. Why haven't we done this? http://thechive.com/2013/09/17/guys-rig-up-buddies-plumbing-with-beer-wh...